KGOP CRM — Office Worker Getting Started Guide
How to log in and use the Office Worker Portal
1. Logging In
What You Need
- A username and password (provided by your supervisor or the CRM administrator)
- A web browser (Chrome, Edge, Firefox, or Safari all work)
Steps to Log In
1
Open the login page.
In your browser's address bar, type crm.kgop.us and press Enter.
You will see the KGOP landing page (shown below). Click "Login to Member Portal" at the bottom,
or go directly to: crm.kgop.us/wp-login.php
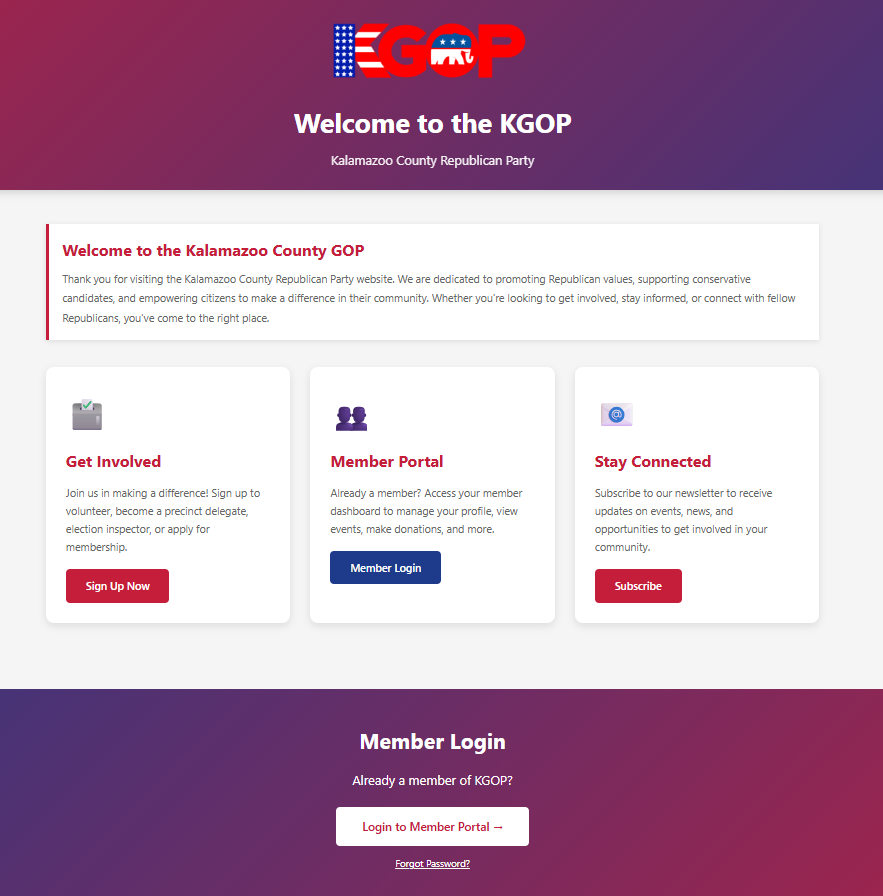
The KGOP landing page at crm.kgop.us — click "Login to Member Portal" at the bottom
2
Enter your credentials.
Type your Username (or email address) and Password, then click "Log In".
If you don't know your password, click "Lost your password?" to receive a reset link by email.
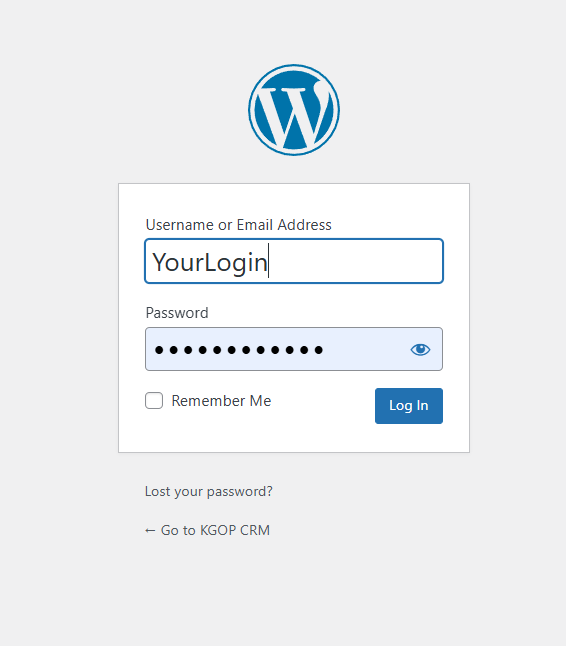
The login page — enter your username and password, then click "Log In"
3
Accept the Data Use Agreement (first time only).
The first time you log in (or when the agreement is updated), you will see a Data Use Agreement page.
Read the agreement, check the box, and click "I Accept". You only need to do this once.
4
You're in!
After login and agreement acceptance, you will see the Member Portal (shown below).
If you are a staff member, click the red "Office Worker Portal" button in the Quick Access bar
to get to your main workspace.
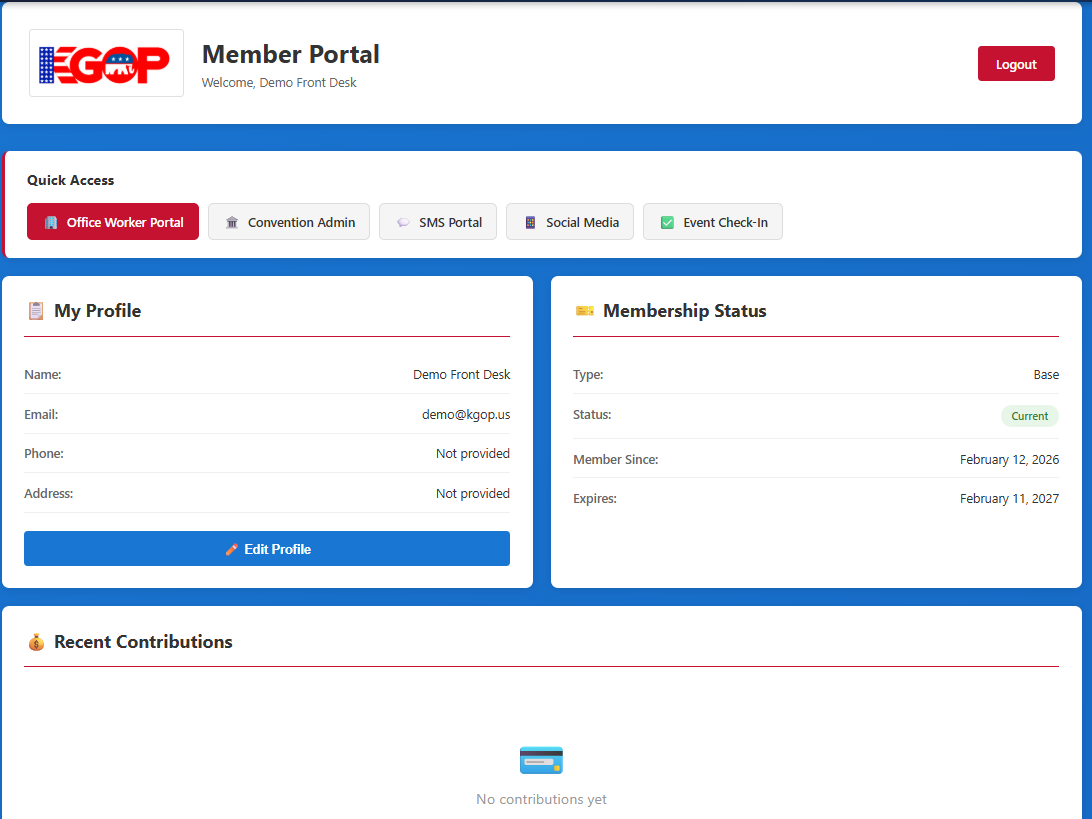
The Member Portal — staff members click "Office Worker Portal" in the Quick Access bar at the top
Tip: Bookmark crm.kgop.us/office-worker-portal.php for quick access.
If your session has expired, you'll be asked to log in and then returned to the portal automatically.
2. The Office Worker Portal
The Office Worker Portal is your main workspace. It has three areas:
- Top Navigation Bar — the dark red bar across the very top with links to other portals and your logout button
- Left Sidebar — the red menu on the left with all the tools you'll use daily
- Main Content Area — the large area on the right where search results, forms, and details appear
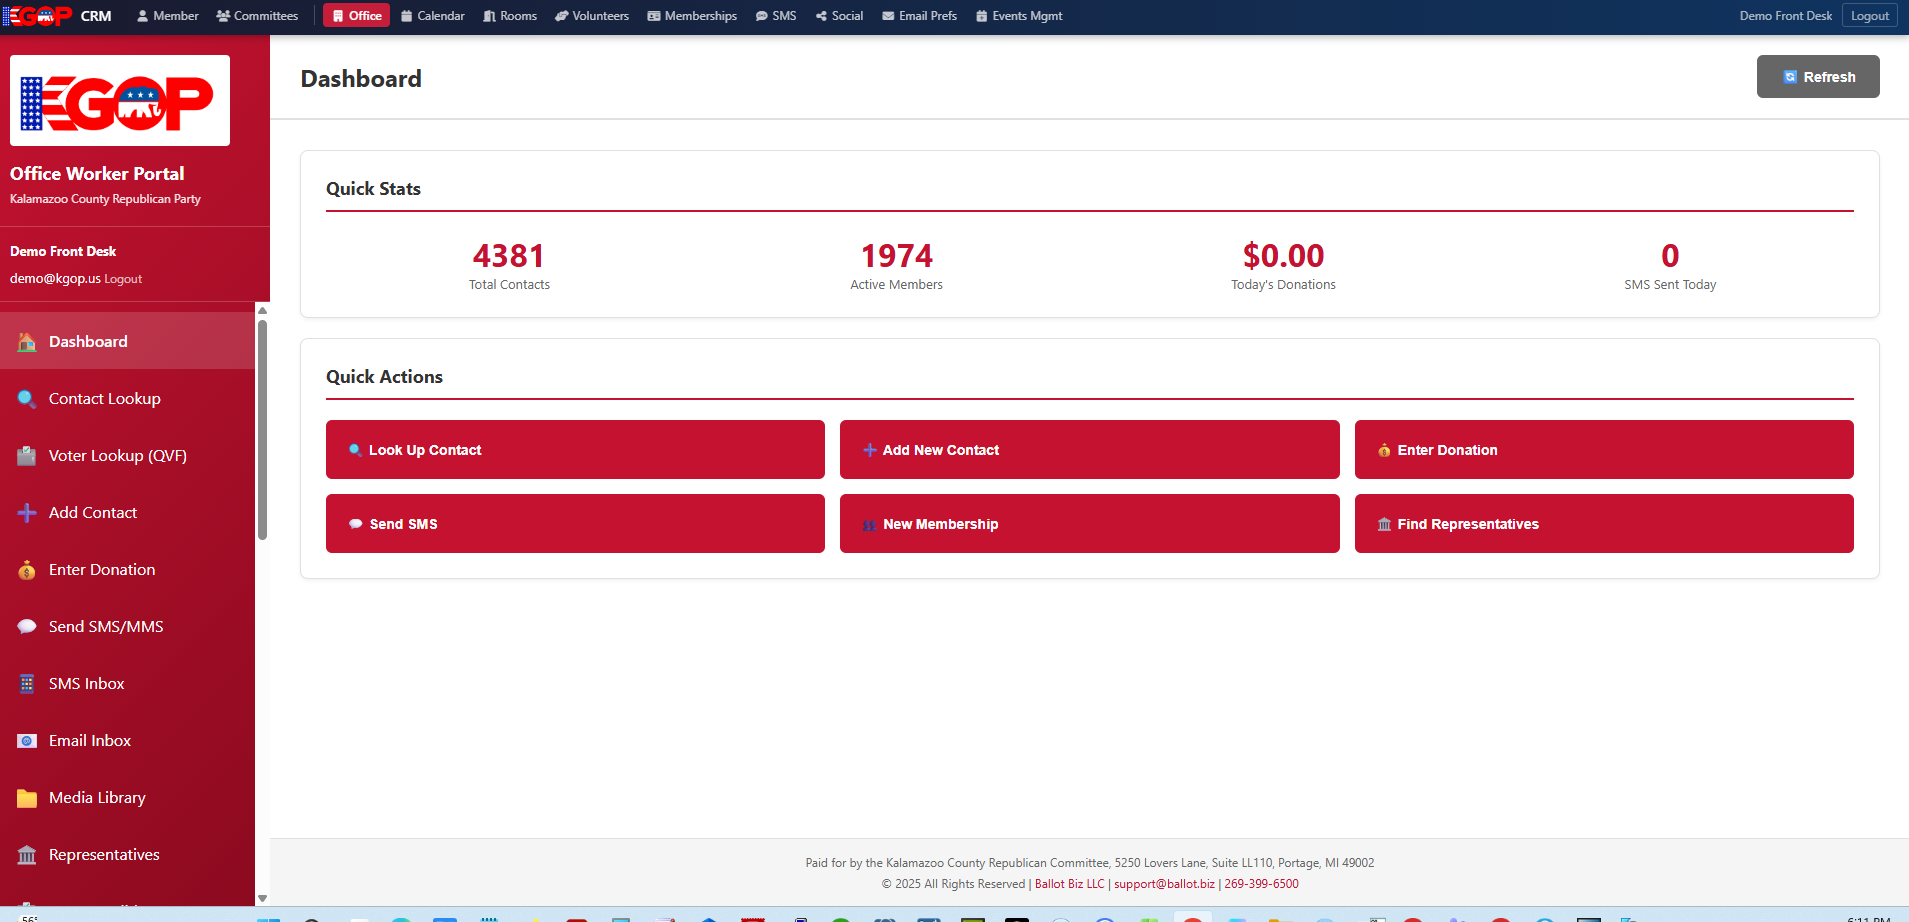
The Office Worker Portal — sidebar menu on the left, Quick Stats and Quick Actions in the main area
Top Navigation Bar
The thin dark red bar across the very top appears on every portal page. It shows:
- Portal links on the left — quick jumps to Office, Calendar, Rooms, Volunteers, Memberships, SMS, Social, Email Prefs, and Events Mgmt (depending on your role)
- Your name and a Logout link on the right
Left Sidebar
The red sidebar on the left is your main menu. Click any item to load that tool in the main content area. The sidebar shows your name and email at the top.
| Section | What It Does |
|---|
| Dashboard | Overview with Quick Stats (total contacts, active members, today's donations, SMS sent) and Quick Action buttons |
| Contact Lookup | Search for any contact by name, email, phone, or member number |
| Voter Lookup (QVF) | Search Michigan's voter registration database |
| Add Contact | Create a new contact record |
| Enter Donation | Record a donation (cash, check, or card) |
| Send SMS/MMS | Send a text message to a contact |
| SMS Inbox | View incoming text messages |
| Email Inbox | View incoming emails |
| Media Library | Upload and manage images for SMS/MMS |
| Representatives | Look up elected officials by address |
Scroll down in the sidebar to find additional sections including Membership Application, Member Directory, Event Check-in Admin, Help & Procedures, and Staff Directory.
Note: You may see additional links in the top navigation bar depending on your role. Officers see extra options like Events Mgmt, Convention Admin, and PD Recruitment.
Contact Badges
When you search for a contact, colored badges appear next to their name:
| Badge | Meaning |
|---|
| MBR | Active member |
| PD | Precinct Delegate |
| ALD | At-Large Delegate |
| EC | Executive Committee member |
| NEWS | Newsletter subscriber |
| DONOR | Has made a donation |
| EI | Election Inspector |
3. Common Tasks
Looking Up a Contact
- Click "Contact Lookup" in the sidebar.
- Type a name, email, phone number, or member number in the search box.
- Click "Search" or press Enter.
- Click on a contact in the results to view their full record — membership status, donations, groups, and communication history.
Looking Up a Voter
- Click "Voter Lookup (QVF)" in the sidebar.
- Enter the person's first and last name (and optionally city or zip code).
- Click "Search" to query the Michigan voter file.
- Results show registration status, address, and voting history.
- Use "Add To Contacts" to create a CRM record, or "Membership Application" to start a membership.
Recording a Donation
- Click "Enter Donation" in the sidebar.
- Search for the donor by name or member number.
- Enter the amount, payment method (cash, check, or card), and date.
- Click "Save". The donation is recorded and linked to the contact.
Submitting a Membership Application
- Click "Membership Application" in the sidebar (scroll down).
- Search for the person or enter their information.
- Select the membership type and enter payment details.
- Click "Submit". An officer will review and approve the application.
Using Quick Actions
The Dashboard also has large Quick Action buttons for the most common tasks: Look Up Contact, Add New Contact, Enter Donation, Send SMS, New Membership, and Find Representatives. These are shortcuts to the same tools in the sidebar.
4. Other Portals
Jump to these from the top navigation bar:
| Portal | Purpose |
|---|
| Calendar | View upcoming events |
| Rooms | Reserve office meeting rooms |
| Volunteers | View and sign up for volunteer shifts |
| SMS | Send bulk text messages to groups |
| Social | Post to social media platforms |
| Member | View your own membership info |
| Committees | Committee documents, meetings, and messages |
5. Logging Out
1
Click "Logout" in the top-right corner of any portal page (in the dark red navigation bar).
You can also click the "Logout" link below your name in the sidebar.
Tip: Always log out when you leave the computer, especially on shared workstations.
Your session will expire automatically after a period of inactivity, but it's good practice to log out manually.
6. Getting Help
- Built-in help: Click "Help & Procedures" in the sidebar for searchable articles.
- Wiki: Visit
wiki.kgop.us for detailed training materials.
- Technical support: support@ballot.biz or 269-399-6500
- Organization questions: info@kgop.org or 269-323-0067